Updating and experimenting with your WordPress website is essential for keeping it secure, functional, and up-to-date. Whether you’re installing new plugins, changing themes, or redesigning your layout, making these changes can sometimes and unexpectedly cause issues like downtime, bugs, or unexpected errors.
Have you ever hesitated to make significant changes to your WordPress website—perhaps updating a plugin, switching themes, or redesigning your layout—fearing it might break your live site or disrupt your visitors’ experience? Many website owners and developers share this concern, especially when working on a website that’s crucial for business, branding, or personal projects.
What is a Staging Site?
A staging website is essentially an exact copy of your live website. It acts like a controlled laboratory for your website—a clone that allows you to simulate updates, troubleshoot issues, and try out new ideas without affecting your live site. Think of it as a rehearsal space before a big performance; you can perfect your act without the audience watching, ensuring everything runs smoothly when it’s time to go live.
A WordPress staging site is the same. It’s a clone you can freely modify, test updates, install new plugins, change themes, or tweak code—all without risking your main site’s stability or user experience. When you’re ready, you can then push your changes from the staging environment to your live site. Whether you’re fixing bugs, experimenting with design, or testing new features, a staging environment minimizes the risk of errors impacting your visitors or damaging your search engine rankings.
We’ll review benefits of staging sites and show you ways to set one up for your WordPress website. Whether you’re a beginner or an experienced developer, you’ll be able to create a safe playground for testing changes, troubleshooting issues, and innovating with peace of mind.
Why Use a Staging Site?
Here are some compelling reasons why every serious website owner should consider creating a staging environment:
Seamless Testing of Updates
Updates are vital for security and performance. But applying updates directly to your live site can cause unexpected problems. Testing updates on a staging site ensures compatibility and stability before going live.
Safe Troubleshooting and Bug Fixing
Websites can be complex, and errors like plugin conflicts or theme incompatibilities are common. A staging site offers a safe space to diagnose and resolve these issues without affecting your visitors.
Risk-Free Experimentation
Want to try a new design, add custom code, or implement advanced features? Your staging site is the perfect sandbox for experimentation, allowing you to refine your website without downtime or negative SEO impacts.
Backup and Recovery
Cloning your website into a staging environment creates an additional backup point. If anything goes wrong, you can revert to this safe copy, saving time and protecting your data.
How to Create a WordPress Staging Site: 3 Proven Methods
There are several ways to set up a staging environment for your WordPress website. Here, we’ll cover three popular and effective approaches:
1. Using Your Web Hosting Provider
Many hosting providers offer built-in staging tools, often accessible through their control panels or dashboards.
2. Using WordPress Plugins
Plugins like WP Staging and WP Stagecoach simplify the process, allowing you to create and manage staging sites directly from your WordPress dashboard.
3. Manual Setup (Advanced)
For those comfortable with technical tasks, manually creating a staging site involves configuring subdomains, copying files, and duplicating databases—recommended only for experienced users.
Method 1: Creating Staging Site via Hosting Provider
Many hosting services include tools that allow one-click installation and staging options. Softaculous, for example, is a one-click installer used by some web hosting providers that let you create a staging site instantly from the dashboard.
Log into your hosting account dashboard and look for “Softaculous” or Website Management section.
Select your website and find an option to create a staging environment.
If within Softaculous, find your WordPress installation and look for options like Clone or Create Staging then follow the instructions to generate your staging environment.
While simple, integrated with no extra plugins needed, it depends if your hosting provides such features and customization may be limited.
Method 2: Creating a Staging Site Using WordPress Plugin
Plugins offer flexible, user-friendly options to spin up a staging site directly within the WordPress dashboard.
WP Staging is a good option for quickly setting up the staging environment. While you can test things and make edits, you will need the Pro version to apply those changes to your live site.
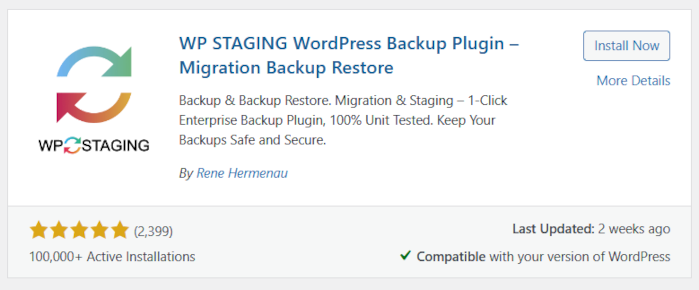
From within your WordPress dashboard and go to Plugins >> Add New. Search for WP Staging and instal then activate.
Then navigate to WP Staging from the left menu.
Click Create New Staging Site.
Name your staging site and click Start Cloning.
Wait for the process to complete; once done, access your staging site via the provided link.
To push changes to your live site, use the Push Changes feature (available in the pro version).
While easy and quick to setup without the need for technical server management, some plugins such as WP Staging are paid and may store staging data externally.
Method 3: Manual Staging Site Setup (Advanced)
This approach involves manually creating a subdomain, copying files, and duplicating your database. You’ll need access to your website’s files and database, through tools within your web hosting provider such as File Manager, and Database Management or phpMyAdmin.
Create a Subdomain:
A subdomain would be best to avoid subdirectory and permalink issues with your main website. First, within your hosting dashboard find the Subdomains/Addon Domains section.
Create a new subdomain (e.g., staging.yourdomain.com). If you connected your domain to your hosting provider via nameservers, your new subdomain should be up right away. If you manage your domain’s DNS, you may need to create additional records for this subdomain to also point to your host.
Duplicate Your Files and Database:
Use FTP or file manager to copy your website files into the subdomain directory.
Export your current database via phpMyAdmin or database management tool.
Create a new database and import this file.
Edit your “wp-config.php” file and update values to point to the new database (beginning with “define( ‘DB_”
You’ll then need to update the URL your website uses. Either within the database’s wp_options table or adding the following values in the “wp-config.php” file between the mentioned lines:
/* Add any custom values between this line and the "stop editing" line. */

define( 'WP_HOME', 'https://staging.yourwebsite.com' );
define( 'WP_SITEURL', 'https://staging.yourwebsite.com' );

/* That's all, stop editing! Happy publishing. *
Configure the Staging Site:
Test your staging environment thoroughly, updating permalinks within Settings >> Permalinks and other features.
This method is more complex and time-consuming, but allows you full control of your testing environment.
Final Tips for Managing Your Staging Site
When managing a staging site, these are some tips to keep edits protected:
Keep it private: Restrict access via password protection or IP whitelisting.
Backup regularly: Before deploying changes, back up both your staging and live sites.
Test thoroughly: Use the staging environment to verify all updates, plugins, and custom code.
Deploy carefully: When you’re satisfied, push your changes from staging to live, ideally during low-traffic times.
Creating a staging site is an essential best practice for maintaining a professional, secure, and reliable WordPress website. Whether you leverage your hosting provider’s tools, use dedicated plugins, or go the manual route, a staging environment empowers you to experiment and improve confidently, without risking your live website’s stability.
Start building your staging environment today, and enjoy a safer, more flexible web development process!

Leave a Reply