Plugins on a WordPress website can further enhance its features and capabilities. A WordPress plugin is a piece of software that adds additional features and functionality to your website. Similar to applications on your smartphone, they aren’t required but help you make the most out of your project.
Learn how to install a plugin right within your WordPress dashboard through the search or upload tool or manually within the files.
- Search for Plugins in Dashboard
- Manual Upload
- Through Dashboard
- Through Files
Search For Plugins in Dashboard
Searching then installing a plugin right from the dashboard is the easiest way to install a plugin on your WordPress website. First you’ll need to log in through your admin login URL (typically yourwebsite.com/wp-login.php or yourwebsite.com/wp-admin) then click Plugins on the left-side menu.
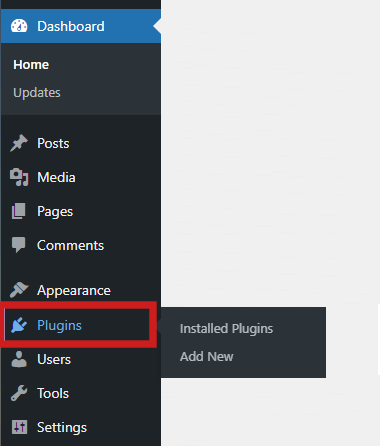
Once there, just click the “Add New” button at the top of the page.

You can then find plugins by category like Featured, Popular, Recommended, Favories or make a new search.

Manual Upload
Manually uploading a plugin requires you to first obtain the plugin file from it’s official plugin page. You can search for plugins on WordPress’ plugin directory here↗.
Manually Uploading Through Dashboard
Uploading a plugin through the dashboard is useful if you need to upload many plugins or if your plugin developer provides a direct file. From the Plugins page, click “Add New” then choose “Upload Plugin.”

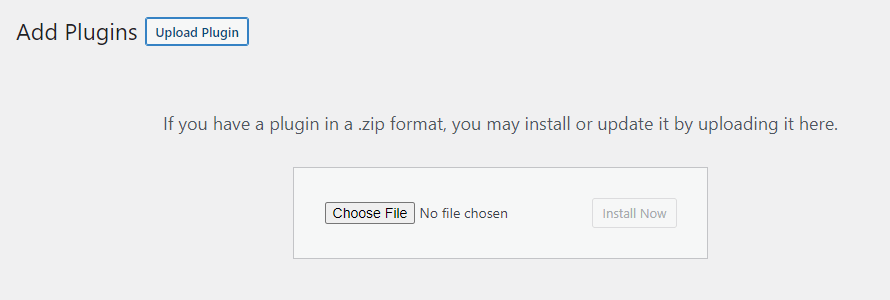
A new section will open where you will click Browse and choose the plugin file you downloaded.
Manually Uploading Through Files
Uploading a plugin through the files is similar to the WordPress dashboard but requires you to upload it to the plugins folder. Within your web host’s File Manager or your website files, upload the ZIP file to the wp-content / plugins folder. Once it’s uploaded, extract the ZIP file. This will create the folder and files for the plugin from the ZIP file. Once you do this, head to the dashboard to Plugins and activate it.

Leave a Reply